Okay, I don't usually do much talking about the various facets of my trip report photography, preferring instead to just post my favorite pics and videos shot along the way and let them (and accompanying captions) speak for themselves.
However, the moderator of this fairly new Train Photography forum, GG-1 (Eric), thought AU folks who also enjoy railroad photography might be interested to read a topic about the ways I go about pursuing these fun hobbies - railroads and photography - that go hand-in-hand so well. While not sure how much I might have to contribute to the overall subject, perhaps GG-1 is right. And since he's a personal friend-O-mine, I agreed to give it a shot. Even if there's nothing new or worthwhile to be learned from my photo rants, hopefully comments and contributions by you, the Valued Reader, and other Valued Readers, WILL provide useable and worthwhile rail photo ideas in an ongoing discussion. Hey, I'm out here ragin', road trippin', and photo takin' for another 4 weeks. Surely among us all, and in all that time, we can come up with SOMETHING!
Let's start with the hardware basics. No camera reviews or recommendations, only what I'm using to capture the stuff that ends up getting posted - and all the stuff that gets trashed during editing before seeing the light of day as well.
The camera is a Kodak EasyShare 1015 IS. It's no longer made, and I bought it new near the end of the model's production run. It's a glorified point-and-shoot, with 15X optical zoom. Right off the bat we have a couple points that take us beyond the hardware itself:
1. Although the 1015 is classified as a point and shoot camera, I only rarely just point and shoot. Unless I have no choice I carefully select and work to get a shot I believe would be optimal. Light direction, shot angle, range, and like that. The more you can do to get a good original shot with the camera, the less you'll need to mess around with the editing software later. See, my goal is presentable photographs, not snapshots to print or e-mail to aunt Zelda. Though I've never used any of the pocket cameras that are so popular these days - point-and-shoots personified - I'm convinced that their features are almost never maximized by the vast majority of those who employ them. One only has to look around at any theme park, beach, or other tourist ghetto to see people trying to shoot family group shots into the sun, or worse. I used to try to warn 'em: "That's not gonna work." Almost invariably they pay no heed, and probably end up blaming the camera for their own incompetence when their pics don't turn out like the TV commercials that convinced them to buy the camera. My niece thought she had a bad camera because many of the shots she saw were out of focus. "Let me see that," I said. She hadn't read the instruction manual, and didn't know to press the shutter button only half way, let the autofocus work, then press down the rest of the way to take the pic.
2. NEVER use digital zoom. I could give a long-winded technical explanation all about why, but take my word on this one. If you want more zoom than the typical 3X on a point-and-shoot, get a camera with greater OPTICAL zoom capability.
3. There is no third thing. Yet.
I'm neither professional nor dogmatic when it comes to rail photography, and I look forward to comments and questions that may be useful for all. This is merely a brief beginning.
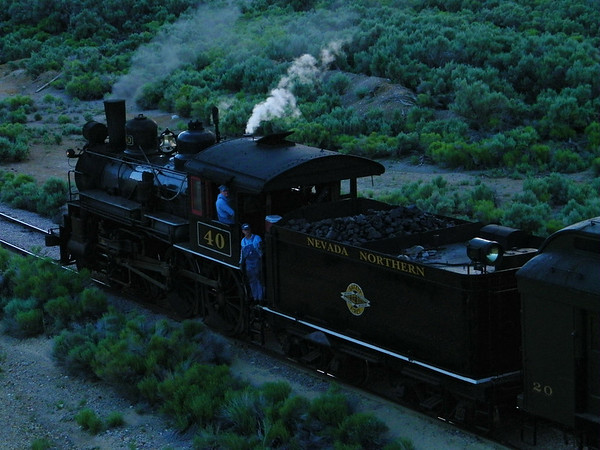
Nevada Northern Railway No. 40 pauses before backing evening train onto wye to turn and return from Ruth mining district near Ely, Nevada. WhoozOn1st photo, taken from mining road overpass, Kodak Z1015 IS camera.